Add exhibitors and create their respective booths
In order to add exhibitors in oDash, you need to follow the steps listed below:
Step 1. Select the event from your oDash in which you would like to add exhibitors.
(Refer to the below image)

Step 2: On the left panel, Under the "Content" section go to "Participants" & select Exhibitor's
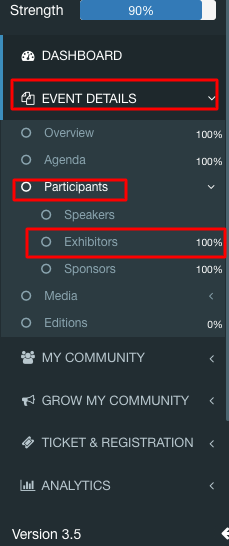
Step 3: Click on "Add exhibitor" to add an exhibitor.
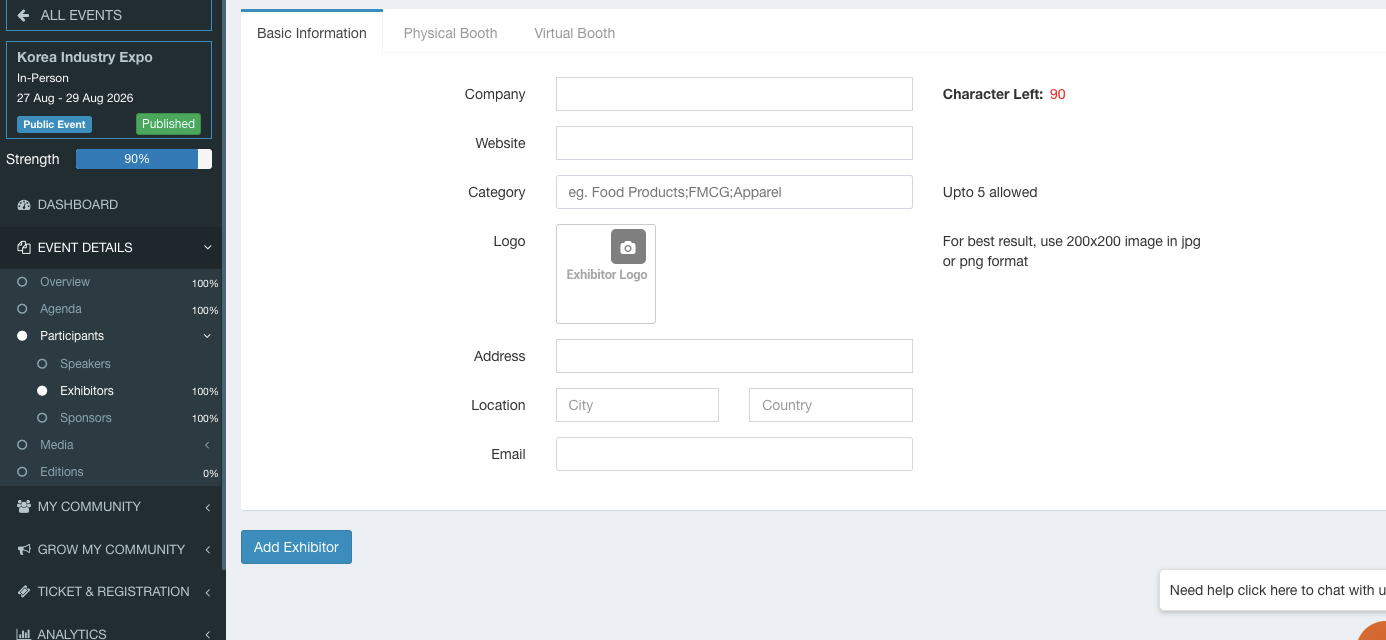
Fill in all the required information and click at the bottom left. Add Exhibitor which is in the blue button highlighted in the above image.
Your added exhibitor will be shown here. ( Refer to the below image).
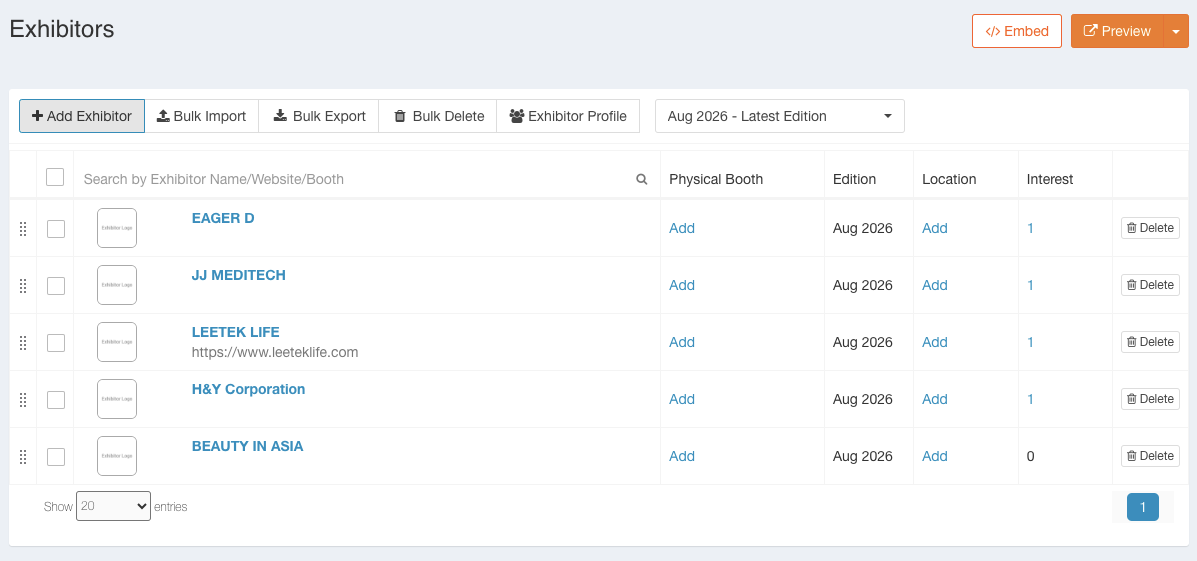
Various filter buttons are also available here.

Add Exhibitor - To add more exhibitors.
Bulk import - To import the exhibitor list. Click here.
Bulk export - The whole list will be downloaded in excel.
Bulk Delete - To delete the whole data.
Exhibitor Profile - You mention here from which profile exhibitors can buy the booth.
After adding the relevant information click on the" Update Exhibitor" blue button present at the bottom left of the page.

Step 5: Your virtual booth is ready here. Unique booth link is also created here to enter the virtual booth.
Through the 'Copy and Share" button where you can share the booth link with their respective owners. Highlighted in red color.
You can add more booth owners from "Add contacts" highlighted in yellow and booth modifications can be done by clicking on "Modify" highlighted in green.

Was this article helpful?
That’s Great!
Thank you for your feedback
Sorry! We couldn't be helpful
Thank you for your feedback
Feedback sent
We appreciate your effort and will try to fix the article