Use credits to reach potential leads from the 10times user base
The Organiser Dashboard (oDASH) allows you to effectively use credits to reach a wider audience and generate high-quality leads. You can redeem credits to send email invites, connect with user intents, send mass messages, and re-engage past attendees.
With access to a 10M+ user database, credits help you amplify your event’s visibility and drive meaningful engagement.
How to Check Credit Balance
Log in to your organisers dashboard (https://login.10times.com/login)
Go to “CREDITS”
Open the Credits & Activity tab to view your available balance
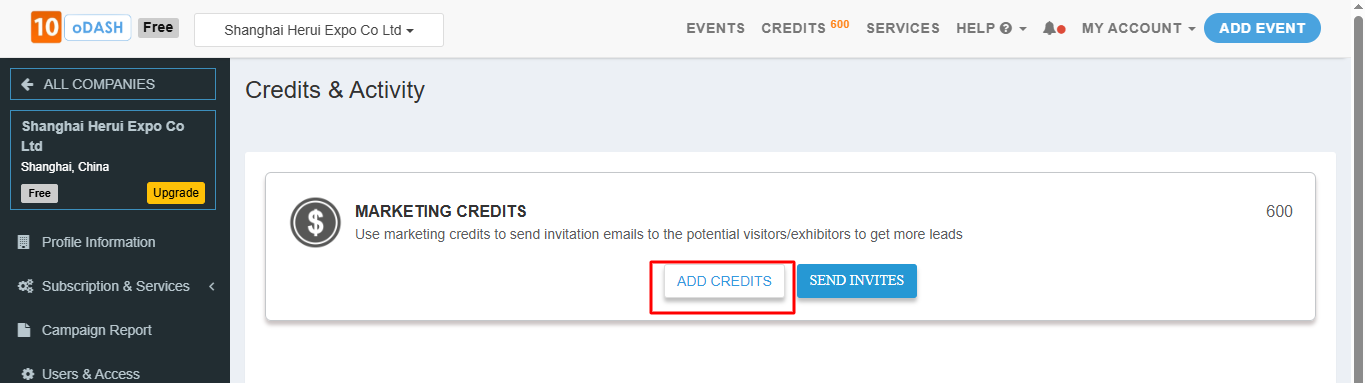
 How to Add Credits
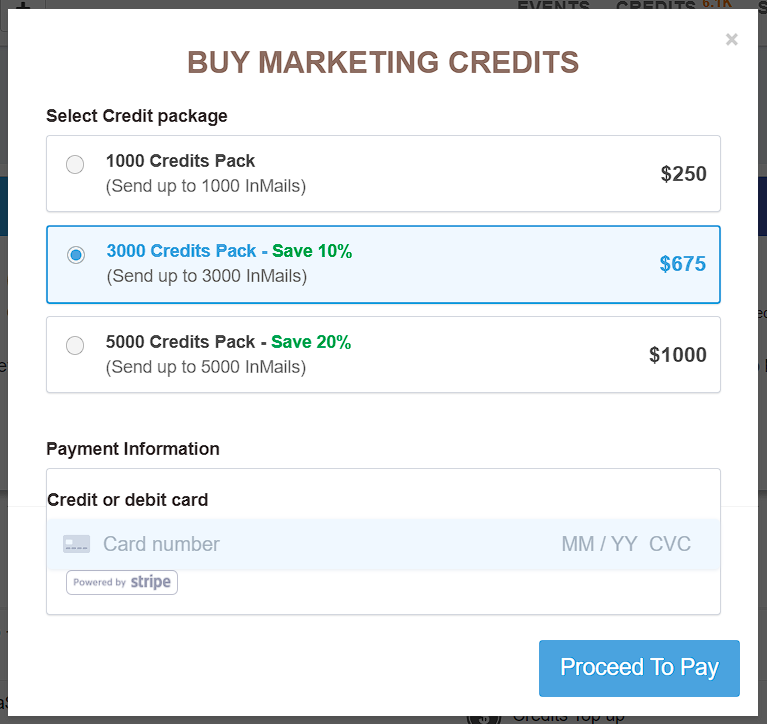
Click on “ADD CREDITS” under Marketing Credits
Choose a suitable package and proceed with payment
What Are Marketing Credits?
Marketing Credits can be used to run email campaigns and send targeted invites to visitors and exhibitors from 10times database.
You can access and use credits directly from the “CREDITS” section on the dashboard or via the Marketing & Campaign module.
Send Invites via Emailer Campaign
Log in to your Organiser's Dashboard (oDASH).
Go to the top of the page, which appears and select "CREDITS"
Alternatively, you can also use credits from the Marketing & Campaign section in your oDASH.
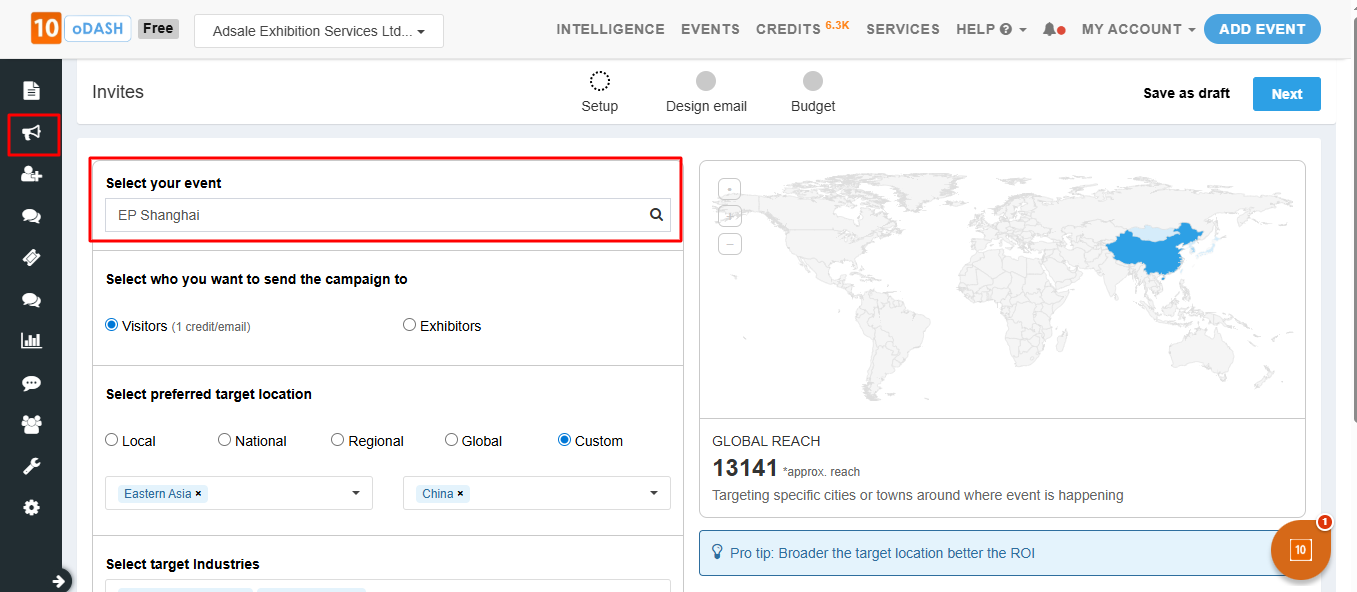
Step1:Steps to proceed with planning your emailer campaign
Select your event
Choose audience type (Visitor/Exhibitor)
Select preferred location (Local, Zonal, Global, or Custom)
Choose industry and add relevant keywords
Click “Next”

Step 2 :Customize content and select a template (e.g., Functional Template for preview)

Step 3 : Budget Enter your campaign budget and click “Schedule/Send”

Note:
1 credit = 1 visitor email
5 credits = 1 exhibitor email
For Indian organizers: 1 credit = 5 visitor emails, and 5 credits = 1 exhibitor email
Using Credits in Intents :
Go to Leads → Manage All Leads → Intents- View users who visited your event page but haven’t registered
Click “Connect” to engage them
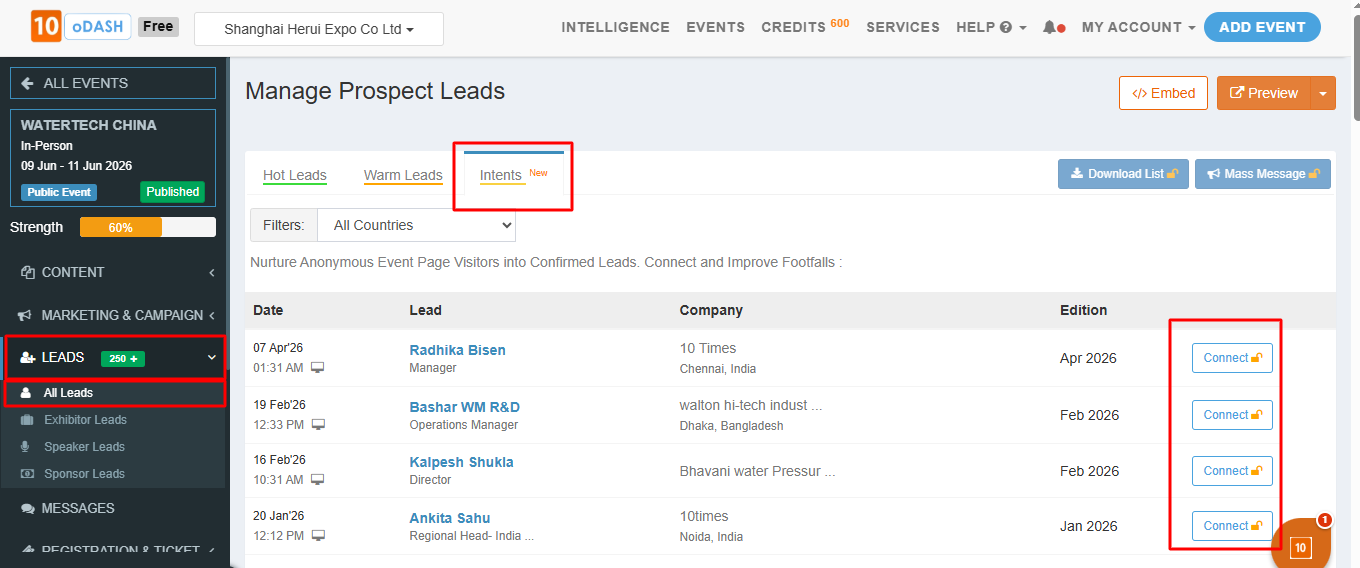
Intents shows the data of the users who have anonymously visited your event page but have not registered to the event. Connect with them to convert them into confirmed leads.
NOTE: 1 Credit will be utilised for sending a Connect request to the Intent Lead
MASS MESSAGE:
Go to Leads → All Leads
Select recipients

Click on “Mass Message”
Add subject and content, then click Send Email

NOTE:1 Credit will be utilised for sending a mass message to the Visitor
5 Credits will be utilised for sending a mass message to the Exhibitor
Check out more details about MASS MESSAGE
RE-Invite:
This feature is available for Previous Edition Leads to connect with them through the re-invite option.
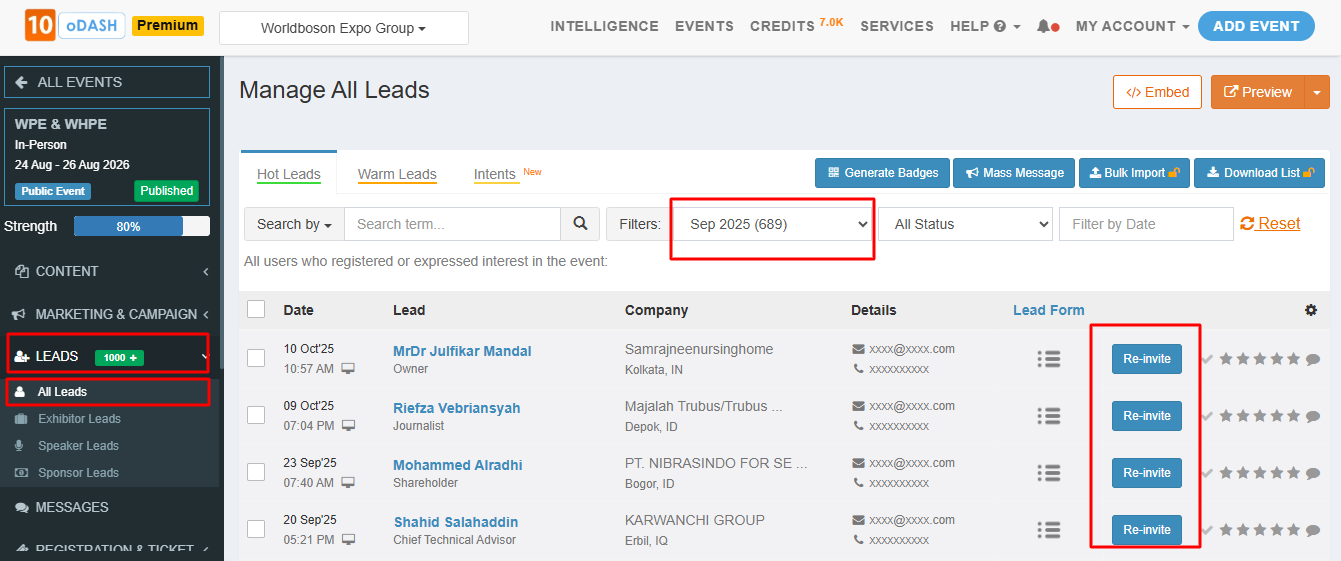
Go to Leads → All Leads
Select a previous event edition
From the right side of each Lead details, click on re-invite to send them a message & connect again with the users. When a user clicks on the re-invite option, a pop-up will appear showing an automated message that will be sent to users.
Click on the "Next" option at the bottom of the pop-up to send the message. (reference img below)
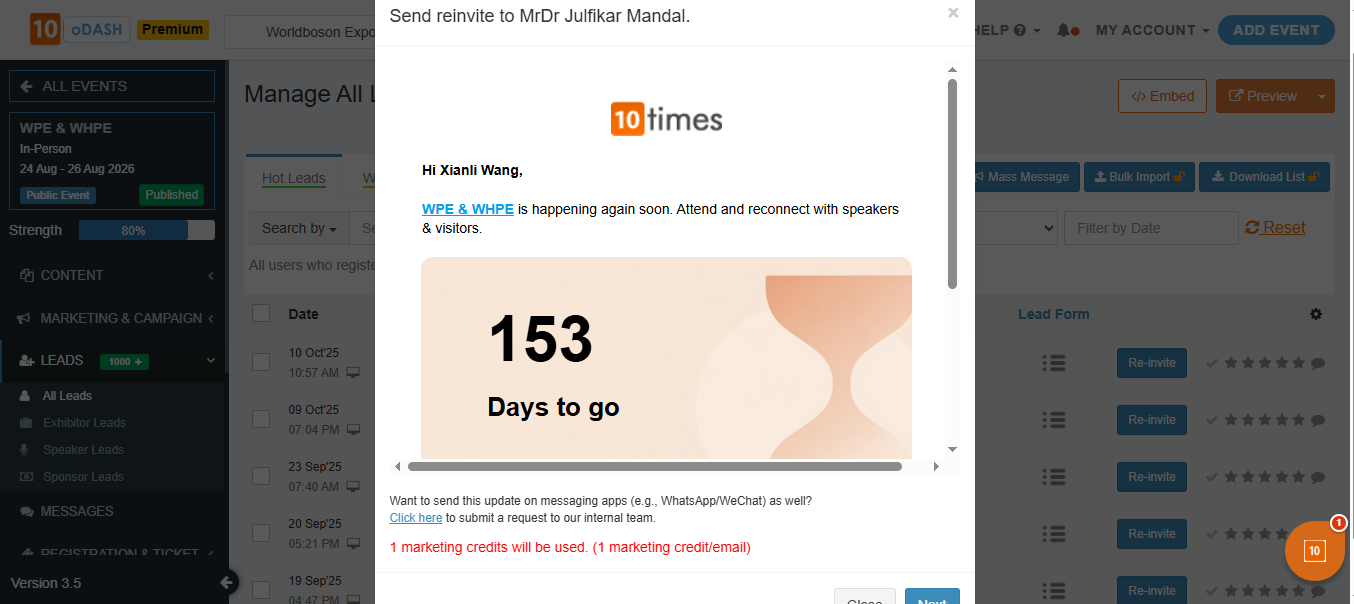
NOTE:1 Credit will be utilised for sending a re-invite to Visitor
5 Credit's will be utilised for sending a re-invite to Exhibitor
Unlock Previous Edition Leads
Go to Leads → All Leads

Select a lead from the list. Please note that lead details from older editions will be locked, and the phone number and email address will not be visible initially.
Click on the “XXXXX” option for the respective lead to unlock and view the contact details.

Users can unlock the details individually as per the requirement:
- 1 Credit will be utilised to unlock the Email Address
- 2 Credits will be utilised to unlock the Phone Number
NOTE: A total of 3 Credits will be utilised to unlock both the Phone Number and Email Address for a single lead.
Important Notes
Up to 100 credits are provided each for Event Enrichment and Event Boost (maximum for 3 events)
Users without an active plan can use up to 400 complimentary credits
Changes made to email templates are reflected in real-time on the event overview page
The Leads section shows both credit-generated and organic leads (organic leads displayed as 10x count)
Validity:
Complimentary credits: Valid for 90 days post-plan expiry
Purchased credits: Valid for 12 months from the purchase date
By using credits strategically across campaigns, intents, and re-engagement tools, you can significantly boost your event’s reach, engagement, and conversions.
Was this article helpful?
That’s Great!
Thank you for your feedback
Sorry! We couldn't be helpful
Thank you for your feedback
Feedback sent
We appreciate your effort and will try to fix the article